2315 days ago
Weight Pop-up Added for Laundry by Weight Products
All Laundry by Weight products now bring up a pop-up window to add weight regardless of whether a scale is being used.

Keep track of all new updates to CleanCloud
All Laundry by Weight products now bring up a pop-up window to add weight regardless of whether a scale is being used.
Each laundry bag now creates a separate line when weighed under the Laundry by Weight product on the order.

On the new Multi Store page you can see a list of your stores using CleanCloud and add additional stores quickly and easily by clicking on the blue "Add Store" button.
To access this page go to; Settings > Admin > Multi Store.
Please note that there is an additional charge for each new store added.

When assigning orders to a machine from the Clean page the customer name will now show on the Machines page.

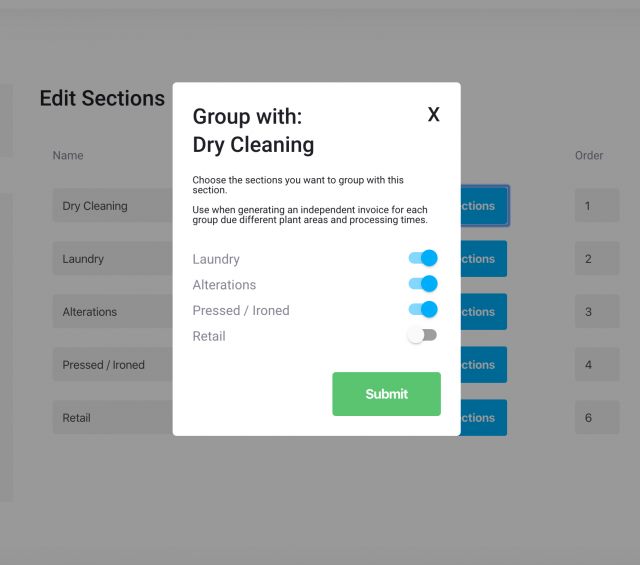
You can now group sections together to prevent items from sections that are not grouped being added to orders.
To activate this setting go to Settings>Admin>Store Settings and scroll down to the setting "Activate Section Groups for New Orders" make sure this is activated and click the green Update button.
To group sections together go to Settings>Products>Sections and click on one of the blue "Choose Sections" buttons.
For more information please see the help desk article below;
https://cleansupport.zendesk.com/hc/en-us/articles/360006602698-Grouping-Sections
Orders on the Ready page will now be highlighted blue is they have been edited from the store or plant view.
There is also a note showing that the order has been adjusted.

You can now delete stations by going to Settings> Printer Settings and clicking on the blue pencil icon next to the station drop down menu.
There you will see a red delete station button.

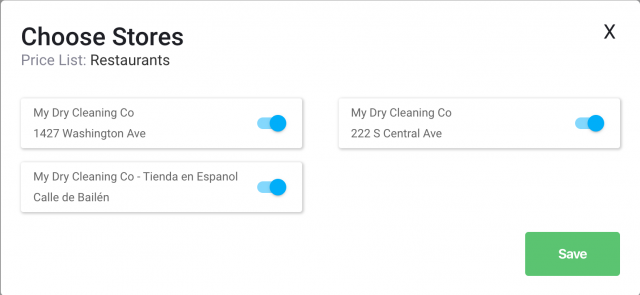
If you have multiple stores using CleanCloud you can select which stores can use a specific price list.
To adjust this go to; Settings > Products and select a price list from the drop down menu (or add a new price list, for more information on how to do this please click here.).
Once the price list is selected scroll down to the bottom of the page, you will see a "Choose Stores" button. You can then select the stores that you want to use this price list, all stores will be able to use a price list as default.
You can now edit the name of your stations by going to Settings> Printer Settings and clicking on the blue pencil icon next to the station drop down menu.
This will bring up a section for you to edit your station name.

When adding a pre-printed heat seal barcode, if the New tag box is checked the system will check to see if the barcode has been used previously.
If the barcode has previously been used a pop-up warning will appear to reduce the chance of staff error.
